How to Use the Ninja Creami for Frozen Desserts, Treats and More

Whether you’ve already purchased this innovative ice cream machine or are thinking about adding it to your small appliance collection, get ready to learn how to use the Ninja Creami so you can start creating these creamy, frozen treats. However, with the seven unique processing settings and countless recipes to choose from, you might be unsure of where to start. Below, you'll find an in-depth guide for how to use the Ninja Creami properly so you get tasty results every time. Before starting, please note that this machine should not be used as a blender or to crush any form of ice or extremely hard ingredients, as this may damage the appliance. Ready to create these delicious frozen desserts? Either watch the video below or continue reading to learn more.

Before You Begin
To begin learning how to use the Ninja Creami, you’ll want to make sure that everything has been thoroughly washed before adding any ingredients into the CREAMi™ pint. You’ll also want to double-check that the temperature of your freezer is set between the range of 9°F and -7°F. This ensures that the mixture will evenly freeze for a delicious, creamy texture every time. Be ready to plan in advance. The pint needs to freeze for 24 hours before you pull it out for processing. If the ingredients have not reached the appropriate temperature (either too cold or too warm), the results, such as the final texture, might be exactly what you want.
- Pro tip: Prepare multiple batches in one go, so all you have to do is grab a pre-frozen pint from the freezer when you’re craving something sweet.

Step One: Preparing Your Mixture
As you start to learn how to use the Ninja Creami, think about which settings you want to use or new recipes to try. You can either choose from the collection of recipes included in the product's booklet or explore new ones online. Once you've found one that you like, gather all of the required ingredients to create the base. Be sure to follow recipe instructions closely, since some combinations are more complex than others.
- Pro tip: This is a great time to add any substitute extract, like almond or vanilla extract, if you would prefer a richer flavor profile. Just one teaspoon should be enough, as you don’t want to add too much. When you're satisfied with the combination of flavors, add the mixture to the pint.
Step Two: Place It in the Freezer Overnight
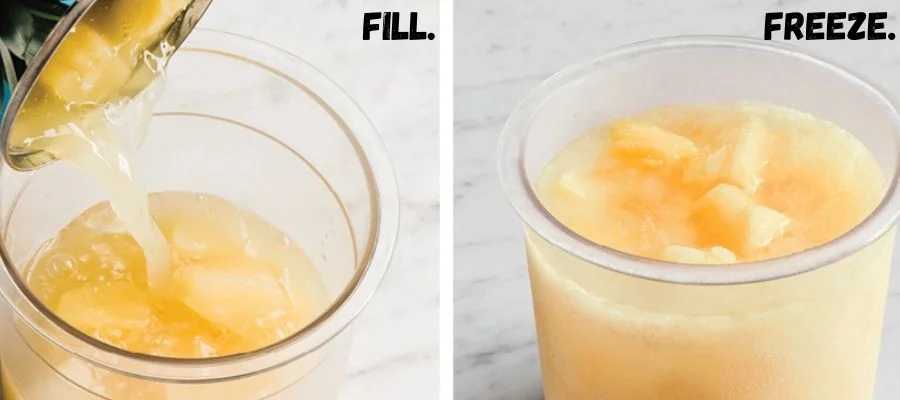
Now that your base mixture is ready, set it into the freezer and let it rest for at least 24 hours. Even though the pint might appear ready after resting overnight, a full 24 hours ensures that the correct internal temperatures have been reached. Make sure that the pint is level when you place it in, since you want to avoid anything from spilling out. This also helps it set properly before you creamify it.
- Pro tip: If you have an upright freezer or bottom freezer refrigerator, these tend to work best, as chest freezers might get the mixture too cold.
Step Three: Using the Proper Program
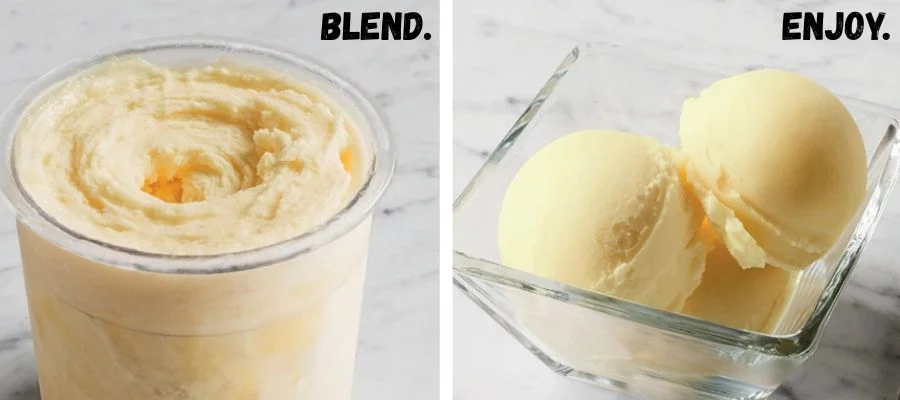
After the 24 hours is up, it’s finally time to create your frozen treat. Gather all of the parts of the Ninja Creami and make sure that everything is clean. Then, assemble the machine according to the Quick Start Guide, which includes a step-by-step set of instructions. A small install light will alert you if the machine has not been assembled correctly. If the light is blinking, then you’re ready to begin mixing; however, if it remains solid, then reevaluate the assembly and check for incorrect placements. When the light starts blinking, remove the pint from the freezer and place it in its designated spot. Select the proper program and let the appliance work its magic. The progress bar will indicate when your creation is ready. Once all four bars flash twice and turn off, the treat is ready.
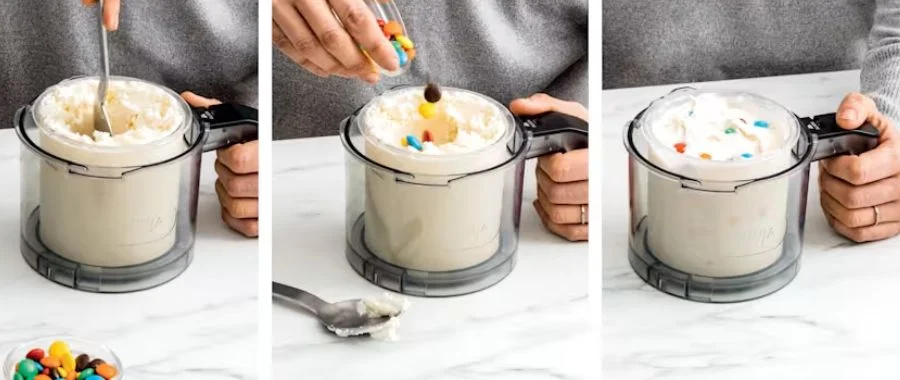
If you would prefer a creamier texture, place the pint back and select the Re-Spin option. This setting is designed for when the base is too cold and needs more time, or if it looks too crumbly. If you are planning to add any mix-ins, such as Oreos, pretzels or frozen fruit, use the Mix-In setting instead. This setting folds the mixture into itself to avoid over-crushing your chosen mix-ins.
- Pro tip: If you want to add fresh ingredients like fruit or sauces, add them right before you eat your homemade dessert. Using the Mix-In setting with these items can cause the texture of your treat to be too thin.
Creating Delicious Milkshakes
When learning how to use the Ninja Creami, know that you don’t have to wait 24 hours before enjoying a creamy milkshake. Instead, combine ingredients in the pint before selecting the Milkshake setting. Then, you just need to wait a few moments before enjoying the sweet flavors of your chosen recipe.
Don’t Forget to Clean
Once you’ve finished creating your flavorful concoctions, make sure you take the time to thoroughly clean the Ninja Creami. This not only keeps the appliance ready for next time but also helps prolong its lifespan, so you'll be enjoying homemade ice cream for many years to come. Before cleaning, disassemble the pint, outer lid and paddle from the machine. Then, rinse each part with warm water and gently scrub any sticky residue or leftover ingredients. For deeper cleaning, place each component into the upper rack of your dishwasher. If any spills occur during the process, gently wipe the exterior of the Ninja Creami down with a damp cloth. Before you reassemble anything, make sure that each piece is completely dry.
Abt's Tasty Tips
Regardless of which frozen treat you’re craving, here are several tips and tricks to help you get the desired, flavorful results with your Ninja Creami.
Enjoying Leftover Creations
Don’t panic if there’s still some of your treat left, just save it for later! Just flatten the top and place the treat back into the freezer. Like before, make sure it remains level as it refreezes. When you remove it, process it again with the same settings you used previously. However, please note that this will further crush any mix-ins that you added.
Using an Ice Bath
Depending on the chosen recipe, you might have to cook the base prior to freezing. In this case, use an ice bath to cool the mixture down before placing it into the freezer, or leave the mixture in the freezer for longer than the standard 24 hours.
Start Creating Delicious Treats Today
Now that you know how to properly use your Ninja Creami to create tasty frozen treats, experiment with your favorite flavors to find your new go-to combinations. If you would like to learn more about the Ninja Creami, our team of appliance experts is here to help at 800-860-3577. For a visual walkthrough, check out the Getting Started video.
How to Use the Ninja Creami FAQs
-
Yes, it’s recommended to let the mixture cool for at least 24 hours; otherwise, you risk the wrong consistency for your frozen treat.
-
Yes, you can use your homemade mixture to create milkshakes for a true homemade dessert.
-
Yes, the Ninja Creami pint containers, along with the lids and paddle, are top-rack dishwasher safe.
-
After you’ve let the mixture freeze for 24 hours, you’re frozen treat will be ready in just 3-5 minutes.
-
The blinking install light means that you’ve assembled the machine properly and the Ninja Creami is ready for you to use.


