Main Content

How to Wire a Thermostat

Learn how to wire a thermostat so you can modernize your home and save energy.
Getting Started
There are a variety reasons why you might purchase a new thermostat. It could be because your previous one was outdated, non-digital and lacked the programmable abilities that current modern displays provide. Maybe you upgraded your home's HVAC system, and want the most advanced thermostat available to match it. But whatever the reason, you now have a brand-spanking-new thermostat you need to install.

But how do you install a thermostat? What about all the wires? This guide is here to help make the process so easy that even a beginner can do it. And fortunately, it will take just a few hours of your time.
Ready to install? Here are simple steps on how to wire a thermostat.
Step One: Understand the Wires
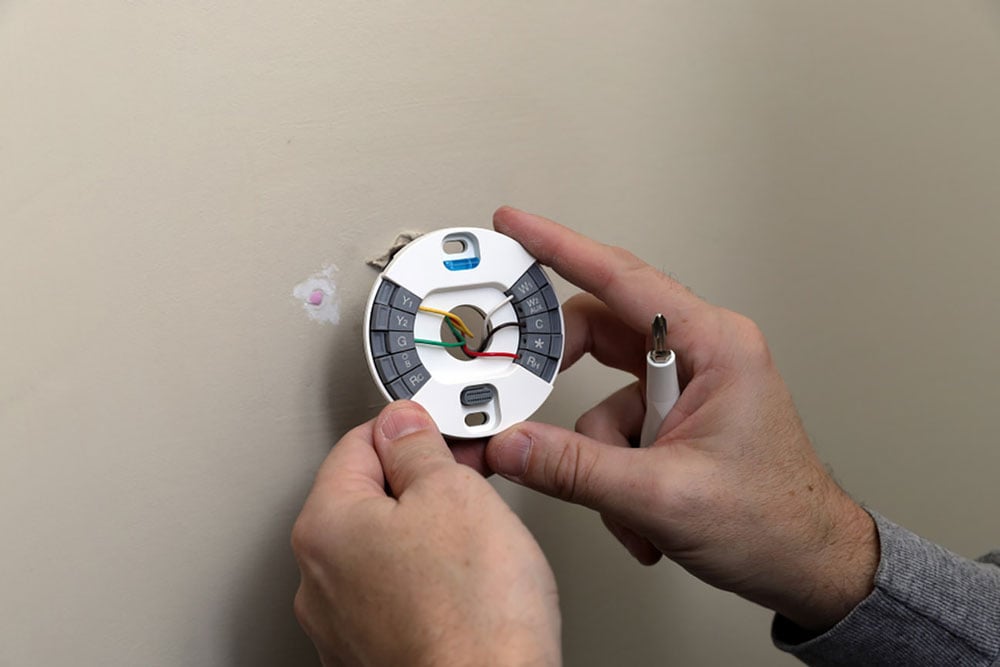
As you detach your old thermostat to replace it with the new one, you'll find some colored wires beneath. But before you begin your thermostat installation, it's essential to learn what these wires are for and how they operate. Here is a list of the standard colored wires you should see.
- White–Connects to your heat ("Heating Enable")
- Yellow–Connects to the compressor ("Cooling Enable")
- Green–Connects to the fan ("Fan ON-Auto")
- Orange–Connects to the heat pump
- Red (C)–Rc connects to the cooling system ("Power 24 Vac")
- Red (H)–Rh connects to the heating system ("Power 24 Vac"). You may find this wire to be red without the "H" label.
- Blue–This is the Common wire, also labeled the "C" wire, which delivers power to your thermostat.
Step Two: De-wire the Old Thermostat
Now that you understand the colored wiring system, it's time to de-wire the old thermostat, starting with the Blue C-wire.
Programmable thermostats (like those from Honeywell) and smart thermostats (many products originating from the Google Nest brand) will always have a C-wire to help set schedules and set your home at a desired temperature. Keep in mind, however, that while some thermostat units can operate without a C-wire, it's highly recommended.
To determine if your current thermostat has a C-wire, follow these steps:
- Turn the thermostat off and listen for the cooling or heating to stop.
- Next, turn off your furnace or air conditioner breaker.
- Last, detach the current thermostat from its wall-mounted plate and find the wire connected to "C"–this is the C-wire.
What to do if there's no C-wire:
- Check inside the wall behind the thermostat to see if there's a C-wire hidden and tucked inside. It's possible the original electrician or installer left the wire inside even if the outdated thermostat didn't call for a C-wire.
- Check the furnace area, too. There could be a C-wire connection and lead available there. If it's at the furnace, this means there is an end to the C-wire lead somewhere near the thermostat.
If by chance you can't find the C-wire lead or distinguish the difference between a two-wire thermostat and a four-wire thermostat, it would be wise to call a professional electrician.
If you prefer to do this yourself, however, you could seek out a new thermostat that doesn't require a C-wire. But be aware that this may limit your thermostat model choices, which can reduce your programmable function abilities.
Step Three: Install and Wire Your Modern Thermostat
With your C-wire ready, follow these instructions to install and wire your new thermostat.
- Turn off the existing thermostat and flip the furnace/AC breaker. If you went searching for the C-wire, you've already completed this step.
- Verify that the connected wires match the standard colored wires listed in Step One. If so, use that as a guide. But if not, you'll need to label them yourself. (Tip: Use a small strip of painter's tape and a pen or marker.)
- Take a photo of your wire connections so you can refer to this as you install your new thermostat.
- Unscrew and disconnect the wires, allowing the backplate to pop off the wall, and secure the wires to the wall with the painter's tape (or you'll lose them inside the wall).
- Replace the old thermostat's plate with the new thermostat plate. Often, homeowners find that there are unpainted areas or even drywall that needs repairing to make a more secure area for the new thermostat model, so take this time into consideration.
- Ensure the plate is level and mark where the screws will go. Pre-drill guide holes before adding sheetrock anchors.
- Before screwing in and securing the backplate, pull the wires through.
- Following the photo you took, reconnect the wires–checking twice.
- Last but not least, put the thermostat cover on and power it up.
After you have followed these instructions to wire your thermostat, now you can have fun setting it up and programming it to your home's needs.


